
How to Install a Second SSD in Your PC Fast
How to Install a Second SSD in Your Windows PC
Upgrading your PC with a second SSD can significantly boost storage capacity, allowing you to store more files, programs, and games without slowing down your system. Installing a second SSD is a straightforward process that involves physical installation and configuring the drive in Windows. This guide provides a step-by-step approach to adding a second SSD to your Windows PC, covering preparation, installation, and initialization using Windows Disk Management. Whether you're using Windows 7, 8, 8.1, or 10, these steps will help you expand your storage efficiently.
Adding a second SSD not only increases storage but also enhances performance, making it ideal for gamers, professionals, and anyone needing extra space. Before starting, ensure you have the necessary tools and components to avoid complications during installation.
Also Read: How to Fix 'No Battery Detected' Error Fast
Preparing to Install a Second SSD
Before you begin, gather the necessary tools and components to ensure a smooth installation process. Installing a second SSD involves two main phases: physically installing the drive in your PC and configuring it using Windows Disk Management to make it usable. Here’s what you’ll need:
- An open drive bay in your PC case
- An available SATA data port on your motherboard
- A 2.5-inch SSD drive
- A screwdriver to open the case and secure the SSD
- A SATA data cable
- An available SATA power connector
- A 2.5 to 5.25-inch adapter (if using a larger drive bay)
Most desktop PCs have multiple drive bays and SATA ports, but it’s crucial to verify availability before purchasing an SSD. Laptops typically lack space for a second SSD, so this guide focuses on desktop installations. If your motherboard lacks free SATA ports, consider a SATA controller card for PCI or PCIe slots. Similarly, if you’re short on SATA power connectors, a Molex to SATA adapter or power splitter can solve the issue.
To prevent damage from static electricity, use an anti-static wrist strap or ground yourself by touching a metal surface before handling internal components. This precaution ensures the safety of your SSD and other PC parts during installation.
Step-by-Step Guide to Physically Installing a Second SSD
Physically installing a second SSD requires careful handling and attention to detail. Follow these steps to securely add the drive to your PC:
- Unplug and Open the PC: Disconnect your PC from the power source and remove the side panel of the case using a screwdriver. Consult your case manual if you’re unsure how to access the interior.
- Locate an Open Drive Bay: Identify an available 2.5-inch drive bay. If only 5.25-inch bays are available, use a 2.5 to 5.25-inch adapter to fit your SSD.
- Install the SSD in a Caddy: Remove the drive caddy (if your case uses one) and secure the SSD into it with screws. If your case lacks a caddy, slide the SSD directly into the bay and secure it with screws or built-in fasteners.
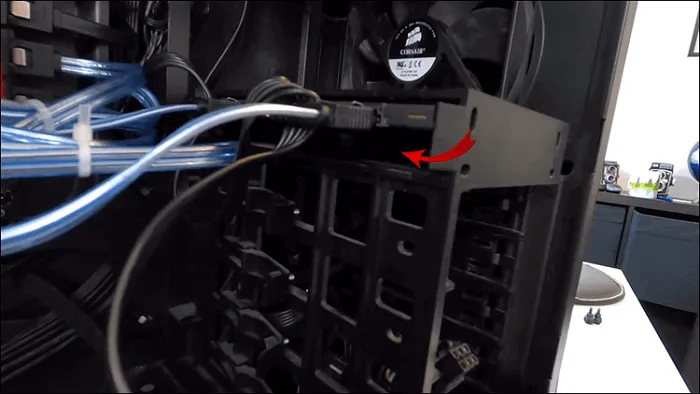
- Reinsert the Caddy: Place the caddy with the SSD back into the drive bay, ensuring it snaps into place or is secured with fasteners.
- Connect the SATA Data Cable: Find an available SATA data port on your motherboard and connect one end of the SATA data cable to it. Attach the other end to the SSD’s data port, ensuring the L-shaped connector is properly aligned.
- Connect the SATA Power Cable: Locate an available SATA power connector from your power supply and connect it to the SSD’s power port. Use a Molex to SATA adapter if necessary.
- Verify Connections: Double-check that all cables are securely connected and that no other components were accidentally loosened during installation.
- Close the Case: Replace the side panel, reconnect all peripherals, and power on your PC.
If your PC doesn’t recognize the SSD after powering on, shut down the system and inspect all connections for loose cables. Ensuring proper installation is key to avoiding issues during the setup phase.
How to Initialize and Format Your New SSD in Windows
After physically installing the second SSD, you must initialize and format it using Windows Disk Management to make it usable. This process prepares the drive for storing files and ensures Windows recognizes it correctly. Here’s how to set up your new SSD:
- Access Disk Management: Open the Control Panel and navigate to System and Security > Administrative Tools > Computer Management > Disk Management. Alternatively, right-click the Start button (Windows 10) or Computer (Windows 7) and select Manage to access Disk Management.
- Initialize the Disk: If prompted, select GPT (GUID Partition Table) for modern systems or MBR (Master Boot Record) for Windows 7, then click OK. GPT is recommended for drives larger than 2TB or for compatibility with newer systems.
- Locate the New SSD: In Disk Management, find your new SSD, which will appear as “Unallocated.” Right-click it and select New Simple Volume to start the setup wizard.
- Follow the Wizard: Click Next in the New Simple Volume Wizard. Ensure the partition size matches the full capacity of the SSD unless you want multiple partitions, then click Next.
- Assign a Drive Letter: Choose a drive letter (or accept the default) and click Next.
- Format the Drive: Select NTFS as the file system, leave the allocation unit size as default, and optionally enter a volume label (e.g., “Second SSD”). Click Next.
- Complete the Setup: Verify the settings and click Finish. Windows will format the drive, making it ready for use.
Once formatted, your second SSD will appear in File Explorer, ready to store files, install programs, or transfer data from your primary drive. You can now use the additional storage to organize your files or improve system performance by offloading large files from your primary drive.
Why Install a Second SSD?
Adding a second SSD to your PC offers multiple benefits beyond just extra storage. SSDs are faster than traditional hard drives, providing quicker file access and improved system performance. By installing a second SSD, you can:
- Store large files, such as videos, games, or design projects, without clogging your primary drive.
- Improve system speed by installing frequently used programs on the SSD.
- Create separate partitions for different types of data, such as work files and personal media.
- Extend the lifespan of your primary drive by distributing data across multiple drives.
Unlike external drives, a second internal SSD is more reliable for constant use and integrates seamlessly with your system, making it a preferred choice for long-term storage solutions.
Troubleshooting Common SSD Installation Issues
If your second SSD isn’t recognized after installation, consider these troubleshooting steps:
- Check Connections: Ensure the SATA data and power cables are securely connected to the SSD and motherboard.
- Verify BIOS Settings: Restart your PC and enter the BIOS (usually by pressing F2, Del, or Esc during boot). Confirm that the SSD is detected in the BIOS.
- Update Drivers: Visit your motherboard or SSD manufacturer’s website to download and install the latest drivers or firmware for your SSD.
- Reinitialize the Drive: If the SSD appears in Disk Management but is unusable, repeat the initialization and formatting process.
If problems persist, consult your SSD’s manual or contact the manufacturer’s support team for assistance. Faulty hardware or incompatible components may require replacement.
Tips for Maintaining Your Second SSD
To ensure your second SSD performs optimally and lasts longer, follow these maintenance tips:
- Keep Firmware Updated: Regularly check the SSD manufacturer’s website for firmware updates to improve performance and fix bugs.
- Avoid Overfilling: Leave at least 10–20% of the SSD’s capacity free to maintain speed and prevent wear.
- Enable TRIM: Ensure the TRIM command is enabled in Windows to optimize SSD performance. You can check this in Command Prompt by typing “fsutil behavior query DisableDeleteNotify” (0 means TRIM is enabled).
- Monitor Health: Use tools like CrystalDiskInfo to monitor your SSD’s health and detect potential issues early.
By following these tips, you can maximize the lifespan and efficiency of your second SSD, ensuring it remains a reliable storage solution for years.
Choosing the Right SSD for Your PC
When selecting a second SSD, consider the following factors to ensure compatibility and performance:
- Storage Capacity: Choose an SSD size that meets your needs, such as 500GB, 1TB, or 2TB, depending on your budget and storage requirements.
- Speed: Look for SSDs with high read/write speeds (e.g., NVMe SSDs for faster performance, though they require compatible slots).
- Brand Reliability: Opt for reputable brands like Samsung, Western Digital, or Crucial for better durability and support.
- Form Factor: Ensure the SSD is a 2.5-inch SATA drive (or NVMe if your motherboard supports it) to fit your PC’s drive bay.
Investing in a high-quality SSD ensures better performance and longevity, making your upgrade worthwhile. Check your motherboard’s specifications to confirm compatibility with SATA or NVMe drives before purchasing.