
How to Fix a Faulty Keyboard Key Fast
How to Troubleshoot and Fix a Faulty Mechanical Keyboard Key
A faulty mechanical keyboard key can disrupt your typing experience, whether you're gaming, coding, or working. Issues like unresponsive or sticky keys are common but often fixable with simple troubleshooting steps. This guide will help you diagnose and fix a faulty mechanical keyboard key, from basic cleaning to replacing switches. By following these steps, you can restore your keyboard’s functionality without immediately replacing it, saving time and money.
Mechanical keyboards are prized for their tactile feedback and durability, but individual keys can fail due to debris, connection issues, or worn-out switches. Before attempting any repairs, ensure your keyboard is unplugged or its batteries are removed to avoid electrical damage.
Also Read: How to Install a Second SSD in Your PC Fast
Step 1: Reconnect the Keyboard
Start with the simplest fix: unplug your mechanical keyboard and plug it back in. For wired keyboards, disconnect the USB cable and reconnect it to a different USB port on your computer. This can reset the connection and resolve minor glitches. For Bluetooth keyboards, try switching to a wired connection if possible. If the key starts working, you’ve fixed the issue without further effort.
If reconnecting doesn’t help, the problem likely lies with the key itself or its switch, so proceed to the next steps.
Step 2: Test with a Different Cable
A faulty USB cable can cause connectivity issues, affecting specific keys. If your mechanical keyboard uses a detachable cable, swap it with another compatible USB cable and connect it to a different USB port. For Bluetooth keyboards experiencing issues, a wired connection can bypass potential Bluetooth driver problems. If the key functions after this, the original cable or port may be defective.
For persistent Bluetooth issues, check for driver updates via your keyboard manufacturer’s website or Windows Device Manager.
Step 3: Replace Batteries in Wireless Keyboards
If you’re using a wireless mechanical keyboard, low battery power can cause keys to become unresponsive. Replace the batteries with fresh ones and check if the faulty key responds. Ensure you use high-quality batteries to maintain a stable connection. If the issue persists, consider testing with a wired connection to rule out battery-related problems.
Battery issues are common in wireless keyboards, so regular checks can prevent unexpected key failures.
Step 4: Clean the Keyboard
Debris under keycaps is a frequent cause of sticky or unresponsive keys. Start by using canned air to blow between the keycaps, holding the keyboard at an angle to dislodge dust or particles. If this doesn’t fix the faulty mechanical keyboard key, remove the keycap of the affected key using a keycap puller or a small flathead screwdriver. Be gentle to avoid damaging the keycap or switch.
Once the keycap is removed, use canned air to clean the switch thoroughly. If the key works after cleaning, consider cleaning the entire keyboard to prevent future issues. Regular maintenance can extend your keyboard’s lifespan.
Step 5: Use Contact Cleaner on the Switch
If cleaning with canned air doesn’t resolve the issue, a contact cleaner designed for electronics can help. Unplug the keyboard or remove its batteries, and work in a well-ventilated area. Remove the keycap of the faulty key, insert the contact cleaner nozzle into the switch stem, and apply one or two short bursts. Move the switch stem up, down, and side to side to distribute the cleaner. Allow the switch to dry completely (usually 5–10 minutes) before replacing the keycap and testing the key.
Use only contact cleaners safe for keyboards, as some chemicals can damage keycaps or switches. If you’re concerned about damaging surrounding keycaps, remove them before applying the cleaner.
Step 6: Inspect Solder Joints
For mechanical keyboards with soldered switches, a broken solder joint can cause a key to stop working. Carefully inspect the solder points on the keyboard’s circuit board (you may need to open the keyboard case). Look for loose or detached solder connections around the faulty switch. If you find a broken joint, you’ll need soldering skills to repair it. Use a soldering iron to reattach the connection, ensuring a secure bond.
If you’re not experienced with soldering, consider consulting a professional technician to avoid damaging the keyboard further.
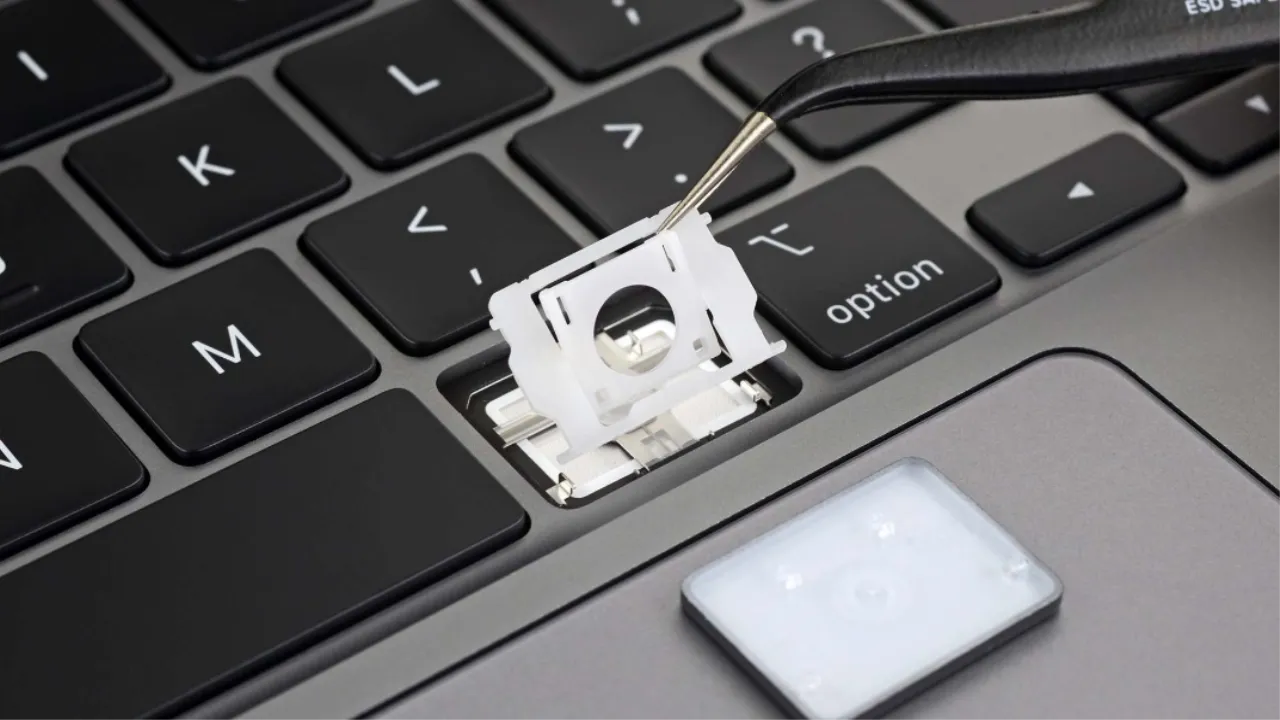
Step 7: Replace the Faulty Switch
If cleaning and soldering don’t fix the issue, replacing the switch is often the solution. Mechanical keyboards use individual switches for each key, making replacement straightforward, especially for hot-swappable keyboards. For hot-swappable switches, use a switch puller to remove the faulty switch and snap in a compatible replacement. Ensure the new switch matches the type (e.g., Cherry MX, Gateron) and specifications of the original.
For soldered switches, the process is more complex. You’ll need to desolder the old switch using a soldering iron and desoldering pump, then solder the new switch in place. If you’re not comfortable with soldering, seek professional help to avoid damaging the keyboard’s circuit board.
Step 8: Address Specific Key Issues (e.g., A Key Not Working)
If a specific key, like the A key, isn’t working, focus on that key’s switch and keycap. Remove the keycap and inspect for debris, cleaning with canned air if necessary. If cleaning doesn’t help, apply contact cleaner to the switch. If the issue persists, replace the switch as described above. This targeted approach is effective for single-key failures, which are often caused by debris or a faulty switch.
If the key still doesn’t work after replacing the switch, the problem may lie with the keyboard’s circuit board or socket (in hot-swappable keyboards). Socket issues are rare but may require professional repair.
Step 9: Consider Replacing the Keyboard
If none of the above steps resolve the issue, the keyboard may have a deeper issue, such as a damaged circuit board. At this point, weigh the cost of professional repair against replacing the keyboard entirely. If replacing the switch and cleaning don’t fix the faulty mechanical keyboard key, a new keyboard may be the most cost-effective solution. Look for a model with hot-swappable switches for easier future repairs.
Before purchasing a new keyboard, test it with another computer to confirm the issue isn’t related to your PC’s settings or drivers.
Common Causes of Faulty Mechanical Keyboard Keys
Understanding why a mechanical keyboard key fails can help you prevent future issues. Common causes include:
- Debris Under Keycaps: Dust, crumbs, or other particles can jam switches, causing keys to stick or become unresponsive.
- Faulty Switches: Mechanical switches can wear out or break internally over time, especially with heavy use.
- Connection Issues: Loose cables, faulty USB ports, or Bluetooth driver problems can affect key functionality.
- Broken Solder Joints: In soldered keyboards, loose or broken solder connections can disrupt switch operation.
- Worn-Out Sockets: In hot-swappable keyboards, sockets can degrade, though this is rare.
By addressing these issues systematically, you can pinpoint the cause and apply the appropriate fix.
Tips for Preventing Keyboard Key Issues
To keep your mechanical keyboard in top condition and avoid faulty keys, follow these maintenance tips:
- Regular Cleaning: Clean your keyboard monthly with canned air or a soft brush to remove debris.
- Avoid Eating Near the Keyboard: Food crumbs can easily get lodged under keycaps, causing sticky keys.
- Use a Keyboard Cover: A cover can protect your keyboard from dust and spills when not in use.
- Check Connections: Periodically inspect cables and ports for wear, especially for wired keyboards.
- Update Firmware: Visit your keyboard manufacturer’s website to download firmware updates for improved performance.
Proactive maintenance can significantly reduce the likelihood of encountering a faulty mechanical keyboard key, ensuring a smooth typing experience.
Choosing Replacement Switches
When replacing a faulty switch, ensure compatibility with your keyboard. Mechanical keyboards use switches from brands like Cherry MX, Gateron, or Kailh, each with different actuation forces and tactile feedback. Check your keyboard’s specifications to select the correct switch type (e.g., clicky, tactile, or linear). For hot-swappable keyboards, verify the pin configuration (3-pin or 5-pin) before purchasing.
Purchase switches from reputable retailers to avoid counterfeit products, which can lead to further issues. If you’re upgrading multiple switches, consider testing a single replacement first to ensure compatibility.
When to Seek Professional Help
If you’re uncomfortable with soldering or suspect a complex issue like a damaged circuit board, consult a professional technician. Attempting advanced repairs without experience can worsen the problem or render the keyboard unusable. Many electronics repair shops specialize in keyboard repairs, and some manufacturers offer repair services for their products.
Before sending your keyboard for repair, back up any custom key mappings or settings if your keyboard software allows it. This ensures you can restore your preferences after repairs.